Tuesday, December 20, 2011

Adding a human readable media type to G-Reg

Adding a human readable media type is a new feature that will be available in the latest WSO2 G-Reg 4.1.1 packs.

The use of this feature comes in when you need to name you media types using something that is more readable than a technical term. For an example say we have media types such as image/x-coreldrawpattern with .pat extension and chemical/x-vamas-iso14976 with .vms extension or
application/vnd.symbian.install with .sis extension.  It is really hard to remember these names.

This difficulty can be eliminated using human readable  media types feature.

Following is how to configure this feature.

  1. Open G-Reg-HOME/repository/conf/mime.types file. This will show you all the supported the mime.types. 
  2. Select a mime type which you need to be mapped to a name of your choice.
  3. Open G-Reg-HOME/repository/conf/mime.mappings file. This is where we are going to add the new name that we are going to use for the given mime type.  The new name you add in this file will map the extension given in the mime.type file.
  4. In mime.mappings file, copy the mime-type wanted to change and tab 5 times and type the custom name. See below for an example: line 20
    #
    # Copyright 2005-2011 WSO2, Inc. (http://wso2.com)
    #
    # Licensed under the Apache License, Version 2.0 (the "License");
    # you may not use this file except in compliance with the License.
    # You may obtain a copy of the License at
    #
    # http://www.apache.org/licenses/LICENSE-2.0
    #
    # Unless required by applicable law or agreed to in writing, software
    # distributed under the License is distributed on an "AS IS" BASIS,
    # WITHOUT WARRANTIES OR CONDITIONS OF ANY KIND, either express or implied.
    # See the License for the specific language governing permissions and
    # limitations under the License.
    #
    
    # This file is to define the human readable media type for a mime type. 
    # Eg:- 
    # text/plain                                      txt text
    application/wsdl+xml                                  mywsdl
    
    
  5. Save and close the file.
  6. Restart the server.
Lets follow these steps to witness the adjustment :)
  1. Login to G-Reg admin console
  2. Navigate to Resource > Browse
  3. Select to add a new resource.
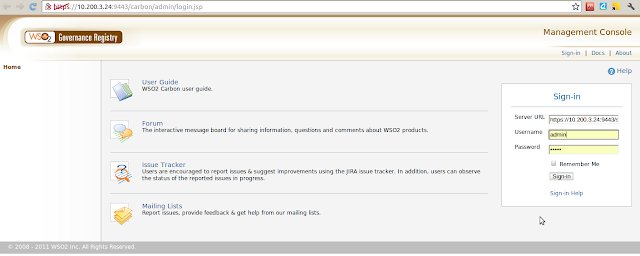
  4. Add a new resource of the type that you adjusted above. When you select the resource you will see the media type that you gave appear in the 'media type' field. (see image below)



Tuesday, November 29, 2011

wso2.org article : Connecting WSO2 G-Reg to a secured & confidential external user store

The previous blog post on 'Connecting WSO2 G-Reg to a secured & confidential external user store' was made an article in wso2.org after elaborating some steps to more detail and also doing a good technical review.

Its available in here


Friday, November 18, 2011

Connecting WSO2 G-Reg to a secured & confidential external user store

From Carbon 3.2.0 onwards we have an embeded LDAP user store which is accessible via port 10389 in default settings. The server also configurable to use LDAP to connect to an external user store. If we need this user store to be secured and confidential it need to be configured to connect via LDAPS.

In this post I will be demonstrating how to connect WSO2 G-REg 4.0.0 to an external user store which will be accessed via secured transport (where the tracffic is transmitted via secured transport).

As pre-requisites we will need WSO2 G-REG 4.0.0 installation which you can download from here. Also we need Apache Directory Server which, we will be using as the LDAP server. You should also have JDK 1.5 or above installed.

With pre-requisites ready, we simply have to follow the steps given below.

Step 1:
Firstly you need to install WSO2 G-Reg 4.0.0 which can be downloaded from here. Extract the .zip file to a location of your preference.

Step 2:

As I mentioned earlier also WSO2 G-Reg is already configured with an internal LDAP user store. In order to connect to an external user store we need to disconnet the existing connection. To achieve this we need to uncomment settings from usermgmt.xml and embedded-ldap.xml. These files reside in GREG_HOME/repository/conf folder.

Lets do these changes like this.
in usermgt.xml comment the default user store manager configuration which is given like below.

<UserStoreManager class="org.wso2.carbon.user.core.ldap.ApacheDSUserStoreManager">
            <Property name="ReadOnly">false</Property>
            <Property name="ConnectionURL">ldap://localhost:${Ports.EmbeddedLDAP.LDAPServerPort}</Property>
            <Property name="ConnectionName">uid=admin,ou=system</Property>
            <Property name="ConnectionPassword">admin</Property>
            <Property name="passwordHashMethod">SHA</Property>
            <Property name="UserNameListFilter">(objectClass=person)</Property>
            <Property name="UserEntryObjectClass">wso2Person</Property>
            <Property name="UserSearchBase">ou=Users,dc=wso2,dc=org</Property>
            <Property name="UserNameSearchFilter">(&amp;(objectClass=person)(uid=?))</Property>
            <Property name="UserNameAttribute">uid</Property>
            <Property name="PasswordJavaScriptRegEx">[\\S]{5,30}</Property>
            <Property name="UsernameJavaScriptRegEx">[\\S]{3,30}</Property>
            <Property name="UsernameJavaRegEx">^[^~!@#$;%^*+={}\\|\\\\&lt;&gt;]{3,30}$</Property>
            <Property name="RolenameJavaScriptRegEx">[\\S]{3,30}</Property>
            <Property name="RolenameJavaRegEx">^[^~!@#$;%^*+={}\\|\\\\&lt;&gt;]{3,30}$</Property>
            <Property name="ReadLDAPGroups">true</Property>
            <Property name="WriteLDAPGroups">true</Property>
            <Property name="EmptyRolesAllowed">true</Property>
            <Property name="GroupSearchBase">ou=Groups,dc=wso2,dc=org</Property>
            <Property name="GroupNameListFilter">(objectClass=groupOfNames)</Property>
            <Property name="GroupEntryObjectClass">groupOfNames</Property>
            <Property name="GroupNameSearchFilter">(&amp;(objectClass=groupOfNames)(cn=?))</Property>
            <Property name="GroupNameAttribute">cn</Property>
            <Property name="MembershipAttribute">member</Property>
        </UserStoreManager>


In embedded-ldap.xml you need to set "enabled" property in "EmbeddedLDAP" to false.
 <Property name="enable">true</Property>


Step 3:
Now we need to enable configurations for the externanal LDAP server. But lets wait until we configure our user store as we still don't have those details with us.

Step 4:
Now we need to install Apache Directry Studio. You can download the .zip ditribution, unzip and use it. The other choice is to use the binary installer. In my case I used the binary installer. I was taken through an installation wizard which prompted me to set locations for the inatalltion, instances and where to keep the startup, who is the default user etc.


Step 5:
Lets enable SSL in ADS. you need to navigate to ADS_INSTANCE_HOME/default/conf/ and open server.xml. Here search for 'tcpTransport address' and check if SSL is enabled. It is enabled by default. If not you need to update with this.


Step 6:
In this setup I am going to use a signed certificate to use in our LDAPS communitcation. I will be using keytool to generate the required keystore and certificates.

Since am going have my LDAP server setup with an SSL server certificate, I must obtain a signed certificate for the server. To achieve this I will be using java keytool and create a self signed certificate (a public/private key pair).

 keytool -genkey -alias carbon_server -keyalg RSA -keystore carbon_server.jks -storepass xxxxxx -validity 730

What is your first and last name?   [Unknown]:  Yumani Ranaweera What is the name of your organizational unit?   [Unknown]:  QA What is the name of your organization?   [Unknown]:  WSO2 What is the name of your City or Locality?   [Unknown]:  Colombo What is the name of your State or Province?   [Unknown]:  Western What is the two-letter country code for this unit?   [Unknown]:  SL Is CN=Yumani Ranaweera, OU=QA, O=WSO2, L=Colombo, ST=Western, C=SL correct?   [no]:  yes Enter key password for <carbon_server>     (RETURN if same as keystore password):  Re-enter new password:


Step 7:
After this we need to update the LDAP server (apacheDS) configuration to use our keystore files. to do this navigate to ADS_INSTANCE_HOME/default/conf/ and open server.xml. Update "keystoreFile" in following segment;

<ldapServer id="ldapServer"
            allowAnonymousAccess="false"
            saslHost="ldap.example.com"
            saslPrincipal="ldap/ldap.example.com@EXAMPLE.COM"
            searchBaseDn="ou=users,ou=system"
            maxTimeLimit="15000"
            maxSizeLimit="1000"
            keystoreFile="/home/yumani/software/LDAP/apacheds-1.5.7_new/external_keystore/carbon_server.jks"
            certificatePassword="secret">

After this restart Apache DS server. In my case will restart it via /etc/init.d (/etc/init.d/ldap restart;)

After the restart we can verify the connections using an LDAP browser. Lets use ApacheDirectoryStudio-linux-x86_64-1.5.2.v20091211.

Step 8:
WSO2 Carbon based products use Java Secure Socket Extension (JSSE) for SSL support. So we need to upgrade JAVA_HOME/jre/lib/security with JSSE provider.

To ensure G-Reg trusts the certificate used by the LDAP server we must install them in G-REGs trust store. So lets export the certificate using keystore.
keytool -export -keystore carbon_server.jks -alias carbon_server -file carbon_server.cer
Enter keystore password: 
Certificate stored in file <carbon_server.cer>

Then lets import this certificate to G-Reg's trust store like this:
 keytool -import -file carbon_server.cer -alias carbon_server -keystore /home/yumani/Documents/support/320/JPMDEVSPRT-31/wso2greg-4.0.0/repository/resources/security/client-truststore.jks -storepass wso2carbon
Owner: CN=yumani, OU=qa, O=wso2, L=col, ST=western, C=sl
Issuer: CN=yumani, OU=qa, O=wso2, L=col, ST=western, C=sl
Serial number: 4eba06d3
Valid from: Wed Nov 09 10:21:31 IST 2011 until: Tue Feb 07 10:21:31 IST 2012
Certificate fingerprints:
     MD5:  EB:23:58:74:3B:6A:1B:CC:26:D8:84:AE:D3:A5:AC:4D
     SHA1: 7F:73:3C:5B:BA:0B:B8:47:69:1E:12:5C:47:EB:D0:E9:C3:08:2E:AB
     Signature algorithm name: SHA1withRSA
     Version: 3
Trust this certificate? [no]:  yes
Certificate was added to keystore


Step 9:
Now that we have configured the LDAP server we need to setup and add user entries to the directory server. The guide (http://fusesource.com/docs/broker/5.3/security/LDAP-AddUserEntries.html) will show you how to complete this task.

Step 10:
Once the user store is setup we need to configure user manager in WSO2 G-Reg to connnect to it. This is how you do that:
Enable following block in G-REG_HOME/repository/conf/usermgt.xml.
        <!--UserStoreManager class="org.wso2.carbon.user.core.ldap.ApacheDSUserStoreManager">
            <Property name="ReadOnly">false</Property>
            <Property name="ConnectionURL">ldap://localhost:10389</Property>
            <Property name="ConnectionName">uid=admin,ou=system</Property>
            <Property name="ConnectionPassword">secret</Property>
            <Property name="passwordHashMethod">SHA</Property>
            <Property name="UserNameListFilter">(objectClass=person)</Property>
            <Property name="UserEntryObjectClass">inetOrgPerson</Property>
            <Property name="UserSearchBase">ou=system</Property>
            <Property name="UserNameSearchFilter">(&amp;(objectClass=person)(uid=?))</Property>
            <Property name="UserNameAttribute">uid</Property>
            <Property name="PasswordJavaScriptRegEx">[\\S]{5,30}</Property>
            <Property name="ReadLDAPGroups">true</Property>
            <Property name="WriteLDAPGroups">true</Property>
            <Property name="EmptyRolesAllowed">false</Property>
            <Property name="GroupSearchBase">ou=system</Property>
            <Property name="GroupNameListFilter">(objectClass=groupOfNames)</Property>
            <Property name="GroupEntryObjectClass">groupOfNames</Property>
            <Property name="GroupNameSearchFilter">(&amp;(objectClass=groupOfNames)(cn=?))</Property>
            <Property name="GroupNameAttribute">cn</Property>
            <Property name="MembershipAttribute">member</Property>
        </UserStoreManager-->

If you had user store configured as [1] you will need to update "UserSearchBase" property to include ou=users as well:
     <Property name="UserSearchBase">ou=users,ou=system</Property>

 
Final step:
Alright we have everything set, lets start WSO2 G-Reg server and acces the user store.

Start carbon server as below;
wso2server.sh -Djavax.net.ssl.trustStore=/path/to/carbon/repository/resources/security/client-truststore.jks -Djavax.net.ssl.trustStorePassword=wso2carbon

Access G-Reg admin console from https://localhost:9443/


Login to the server using admin credentials (admin/admin) as specified in usermgmt.xml

You may navigate to Configure > Users and Roles > Users and see that the user store is connected!!!

Tuesday, November 8, 2011

How to verify your ESB is started with NIO transport or servlet transport

All WSO2 Carbon products use HTTP Servlet Transport Implementation as default HTTP/HTTPS transport, except for WSO2 ESB.  ESB is shipped with HTTP-NIO Transport Implementation as the default transport.

To verify this we can check the following configuration in axis2.xml which resides in ESB_HOME/repository/conf. As we already know axis2.xml keeps the global configuration for WSO2  Carbon based products. The <transportReceiver> and <transportSender> elements within it are used to configure the transport receivers and senders of the server.


If the product is configured to use HTTP-NIO transport implementation the <transportReceiver> and <transportSender> should be set as below.
   <transportReceiver name="http" class="org.apache.synapse.transport.nhttp.HttpCoreNIOListener">
        <parameter name="port" locked="false">8280</parameter>
        <parameter name="non-blocking" locked="false">true</parameter>
        <!--parameter name="bind-address" locked="false">hostname or IP address</parameter-->
        <!--parameter name="WSDLEPRPrefix" locked="false">https://apachehost:port/somepath</parameter-->
        <parameter name="httpGetProcessor" locked="false">org.wso2.carbon.transport.nhttp.api.NHttpGetProcessor</parameter>
        <!--<parameter name="priorityConfigFile" locked="false">location of priority configuration file</parameter>-->
    </transportReceiver>
    <!-- the non blocking https transport based on HttpCore + SSL-NIO extensions -->
    <transportReceiver name="https" class="org.apache.synapse.transport.nhttp.HttpCoreNIOSSLListener">
        <parameter name="port" locked="false">8243</parameter>
        <parameter name="non-blocking" locked="false">true</parameter>
        <!--parameter name="bind-address" locked="false">hostname or IP address</parameter-->
        <!--parameter name="WSDLEPRPrefix" locked="false">https://apachehost:port/somepath</parameter-->
        <!--<parameter name="priorityConfigFile" locked="false">location of priority configuration file</parameter>-->
        <parameter name="httpGetProcessor" locked="false">org.wso2.carbon.transport.nhttp.api.NHttpGetProcessor</parameter>
        <parameter name="keystore" locked="false">
            <KeyStore>
                <Location>repository/resources/security/wso2carbon.jks</Location>
                <Type>JKS</Type>
                <Password>wso2carbon</Password>
                <KeyPassword>wso2carbon</KeyPassword>
            </KeyStore>
        </parameter>
        <parameter name="truststore" locked="false">
            <TrustStore>
                <Location>repository/resources/security/client-truststore.jks</Location>
                <Type>JKS</Type>
                <Password>wso2carbon</Password>
            </TrustStore>
        </parameter>
        <!--<parameter name="SSLVerifyClient">require</parameter>
            supports optional|require or defaults to none -->
    </transportReceiver>


 <!-- the non-blocking http transport based on HttpCore + NIO extensions -->
    <transportSender name="http" class="org.apache.synapse.transport.nhttp.HttpCoreNIOSender">
        <parameter name="non-blocking" locked="false">true</parameter>
    </transportSender>
    <transportSender name="https" class="org.apache.synapse.transport.nhttp.HttpCoreNIOSSLSender">
        <parameter name="non-blocking" locked="false">true</parameter>
        <parameter name="keystore" locked="false">
            <KeyStore>
                <Location>repository/resources/security/wso2carbon.jks</Location>
                <Type>JKS</Type>
                <Password>wso2carbon</Password>
                <KeyPassword>wso2carbon</KeyPassword>
            </KeyStore>
        </parameter>
        <parameter name="truststore" locked="false">
            <TrustStore>
                <Location>repository/resources/security/client-truststore.jks</Location>
                <Type>JKS</Type>
                <Password>wso2carbon</Password>
            </TrustStore>
        </parameter>
        <parameter name="HostnameVerifier">DefaultAndLocalhost</parameter>
            <!--supports Strict|AllowAll|DefaultAndLocalhost or the default if none specified -->
    </transportSender>

Friday, August 5, 2011

How to access WSO2 StratosLive.com from a Google Apps account

This simple step by step guide will show you how to access WSO2 StratosLive.com via a Google Apps Account.

  1. Create a sample Google Apps Account.
    • A sample googleApps account can be created using the following link https://www.google.com/a/cpanel/sample/new.
    • After the account is created, you need to add users by going through 'Administrative Control Panel' > 'Organization & Users' > 'Create a new user'
    • Note: your password for admin login will be sent to the email address that you gave at the creation. Else you can reset admin password while you are creating new users.

  2. Access StratosLive.
    • You may use https://stratoslive.wso2.com/carbon to access StratosLive.
    • In the home page there will be a sign-in button. Click that and you will be redirected to the login prompt for user name\password login and Google Apps login.
    • Click on 'Google Apps' button.

  3. Login to StratosLive via Google Apps.
    • When you click on 'Google Apps' button, it will ask you to enter google app domain name. Give your information here. (e.g. mine is like this yumaniwso2com.sample-ga.com).
    • Remember you don't need to give the user name here. That is; you should NOT give domain name as admin@yumaniwso2com.sample-ga.com. That is not what it asks.
    • Then it will take you to the google apps account where you will be prompt to give your google app's user name and password.
    • Once the credentials are validated you will be taken into StratosLive!!!

  4. Enjoy services at StratosLive with the users of your google apps account.
    • Once in StratosLive; If you go to Configure > Users & Roles in Stratos Manger, you will find all the users in your sample account there.
    • In StratosLive however, this intial usage plan is considered as a 'Demo' version. Therefore it restricts your user count to 1 excluding the admin user.
    • Due to this only you and another one user will be able to login at first.

  5. Upgrade your subscription.
    • To overcome the above limitation, you can upgrade your usage plan easily.
    • Go to 'Configure' > 'Account' > 'Usage Plan Information' and update the usage plan.
    • The information about the level of facilities and related usage charges can be viewed from the 'Pricing Info' link next to the subscription type drop down.

  6. Enjoy StratosLive
    • Once upgraded to a higher usage plan, more than one user from your google apps account will be able to login to StratosLive.com.
    • Now we are fine to explore the services available in StratosLive !!!

Friday, June 17, 2011

Setting up WSO2 Stratos in personal machine

Here are the steps to setup Stratos in your personal machine.

1. Checkout the stratos setting-up script from here.
     https://svn.wso2.org/repos/wso2/trunk/carbon/build

2. Copy the wso2straos-manager-1.5.0, wso2stratos-is-1.5.0, wso2stratos-bam-1.5.0 distributions and the binary distributions of the services that you wish to include. i.e. wso2stratos-esb-1.5.0.
Lets mark this place where you copy these .zip files as PACKS_DIR.

3. Export following environment variables to your .bashrc
export PACKS_DIR="/home/yumani/Documents/packs/3.2.0"
export STRATOS_DIR="/home/yumani/Documents/Stratos/stratos320"
export STRATOS_VERSION=1.5.0
export SSO_ENABLED=true
export CREATE_DB=true

export STRATOS_MAIL_TRANSPORT='&lttransportsender class="org.apache.axis2.transport.mail.MailTransportSender" name="mailto"> &ltparameter name="mail.smtp.host"&gtcheetara.wso2.com</parameter>&ltparameter name="mail.smtp.port"&gt25</parameter> &ltparameter name="mail.smtp.starttls.enable"&gtfalse</parameter> &ltparameter name="mail.smtp.auth"&gtfalse</parameter>  &ltparameter name="mail.smtp.from"&gtcloud-noreply@wso2.com</parameter> </transportsender>'
export NOTIFICATION_EMAIL=xxxx@wso2.com
                                                                                                                                                                                     
4. Run stratos-setup.pl. (NOTE: Before this you may need to install 'liblist-moreutils-perl' to execute the perl script)

5. Then update your /etc/hosts file with following;
127.0.0.1 cloud-test.wso2.com
127.0.0.1 identity.cloud-test.wso2.com
127.0.0.1 governance.cloud-test.wso2.com
127.0.0.1 appserver.cloud-test.wso2.com
127.0.0.1 bam.cloud-test.wso2.com
127.0.0.1 dss.cloud-test.wso2.com
127.0.0.1 bps.cloud-test.wso2.com
127.0.0.1 brs.cloud-test.wso2.com
127.0.0.1 cep.cloud-test.wso2.com
127.0.0.1 esb.cloud-test.wso2.com
127.0.0.1 gadget.cloud-test.wso2.com
127.0.0.1 mb.cloud-test.wso2.com
127.0.0.1 mashup.cloud-test.wso2.com

6. After this you can start the servers. You will find that the setting-up script has unzipped all the binary distributions (you copied to PACKS_DIR) into the STRATOS_DIR location which, you specified in .bachrc.

7. Go to above CARBON_HOME.  You have two ways to start the cloud environment.
 i. Running the stratos.sh in STRAROS_DIR. Using stratos.sh you can start all the services and the manager at once or a selected set of services and the manager.
    i.e.
sh stratos.sh startall
sh stratos.sh wso2stratos-manager-1.5.0 wso2stratos-is-1.5.0 wso2stratos-bam-1.5.0

ii. Starting each service using its own startup scripts (CARBON_HOME/bin/wso2server.sh). This way you can first start the manager following wso2stratos-is and wsorstratos-bam. Then the other services as you wish.

That's all.. Now you can access wso2stratos-manager from browser and start using the cloud environment. URL for the stratos-manager can be gained from its startup logs which are printed on the back-end console.


Monday, December 13, 2010

Activity monitoring using WSO2 BAM Server

In this scenario we will be monitoring requests and responses passed through a proxy service in WSO2 ESB. The proxy service is calling an in/out operation in an Axis2Service in WSO2 WSAS.


Lets make the setup.

A) Deploy the axis2 service in WSO2 App Server.


1. Download WSO2 App Server-3.2.1 distribution from here and extract it.

In this setup we are going to have 3 WSO2 servers running at the same time. Therefore, we need to change the http/https ports of each server to make the servers start in different ports. To do this go to the CARBON_HOME/repository/conf and update the http/https ports in mgt-transports.xml and axis2.xml files.

2. Start WSO2 App Server distribution by running the startup scripts in WSAS_HOME/bin/.
$ sh wso2server.sh in Ubuntu and
$ wso2server.bat in Windows.

3. Once the server is started, Sign-in to admin console and go to Services >Add >Axis2Service and upload this service.


Now we have WSO2 WSAS waiting with a service in it at http://192.168.1.4:9764/wsas/services/Axis2Service?wsdl. Let's setup WSO2 ESB.


B) Configure WSO2 ESB

1. Download a WSO2 ESB-3.0.1 distribution from here and extract it. Change its ports and start the server as instructed above.

2. Once the server is started, Sign-in to admin console and go to Manage > Service Bus > Source View. Paste the following configuration into the source view.

<proxy name="DemoProxy1" transports="https http" startOnLoad="true" trace="disable" statistics="enable">
        <target>
            <endpoint name="endpoint_act">
                <address uri="http://192.168.1.4:9764/wsas/services/Axis2Service/" statistics="enable"/>
            </endpoint>
            <inSequence statistics="enable">
                <log>
                    <property name="IN" value="*********IN****************"/>
                </log>
            </inSequence>
        </target>
        <publishWSDL uri="http://192.168.1.4:9764/wsas/services/Axis2Service?wsdl"/>
    </proxy>

NOTE: You may need to chnage the endpoint epr according to your network settings.


C) Add publisher jars to ESB.

We need to enable Activity Publishing in ESB. Since ESB doesn't have activity publishing feature in it by default, we need to add the relevant jars manually.
So download following org.wso2.carbon.bam.data.publisher.activity.mediation-3.0.1.jar & org.wso2.carbon.bam.data.publisher.activity.mediation.ui-3.0.1.jar and copy to ESB_HOME/repository/components/dropins/ folder. This will add 'Activity Publishing' menu to ESB admin console under Configure menu.


Also we need to update the org.wso2.carbon.bam.data.publisher.activity.mediation-3.0.1.jar in ESB_HOME/repository/components/plugins with this patched version.

Lastly we need to enable message tracing in ESB. Open ESB_HOME/repository/conf/carbon.xml and add this;
<MediationStat>
    <MessageTracing>enabled</MessageTracing>
</MediationStat>


In the next step access ESB UI and enable message tracing. Sign-in to ESB admin console, navigate to 'Activity Publishing. In the 'Activity Publisher Configuration' page enable message tracing, go to Activity Publishing and enable eventing.
Message Threshold will be set to 2 by default. This is the minimum number of messages you need to have in the que before being read by a subscriber.
Enable 'Message Dumping' and 'Message Lookup'. Xpath expression is the value from which your message will be filtered for the subscriber.

After configurations on ESB side is done, we need to configure WSO2 BAM to monitor messages from and to ESB.


D) Configure BAM


1. Download WSO2 BAM-1.2.0 distribution from here and extract it. Change its ports and start the server as instructed above.

NOTE: BAM is configured to use H2 database by default. If you want to connect to oracle, mySql or an MS SQL db you need to create the database by running a script and update driverClassName,url, username, password in datasources.properties file which resides in BAM_HOME/repository/conf. Details of configuring to other DBMSs are explained here.

2. Now start WSO2 BAM server and sign-in to the admin console.

3. Navigate to Configure > Monitored Servers > Add Servers.

4. Add the server information of your ESB server, which we are going to monitor. Since we are monitoring mediation, our data collection method should be 'eventing' and type of data thats traced will be 'message'. So the coonfiguration is:

Server URL : https://<server IP>:<server port>
Data Collection method : Eventing
Type of data : Messagega
User Name : user name for ESB
Password : Password for ESB


After this you will have an entry in the 'Monitored Servers' with the information you gave above.


E) Monitor the messages

1. Using a client send messages to the proxy service we created above. i am using following java client.


/*
*Copyright (c) 2005-2010, WSO2 Inc. (http://www.wso2.org) All Rights Reserved.
*
*WSO2 Inc. licenses this file to you under the Apache License,
*Version 2.0 (the "License"); you may not use this file except
*in compliance with the License.
*You may obtain a copy of the License at
*
*http://www.apache.org/licenses/LICENSE-2.0
*
*Unless required by applicable law or agreed to in writing,
*software distributed under the License is distributed on an
*"AS IS" BASIS, WITHOUT WARRANTIES OR CONDITIONS OF ANY
*KIND, either express or implied.  See the License for the
*specific language governing permissions and limitations
*under the License.
*/

package org.wso2.carbon.test;

import org.apache.axiom.om.OMAbstractFactory;
import org.apache.axiom.om.OMElement;
import org.apache.axiom.om.OMFactory;
import org.apache.axiom.om.OMNamespace;
import org.apache.axis2.AxisFault;
import org.apache.axis2.Constants;
import org.apache.axis2.addressing.EndpointReference;
import org.apache.axis2.client.Options;
import org.apache.axis2.client.ServiceClient;
import org.apache.axis2.transport.http.HTTPConstants;
import org.apache.commons.httpclient.HttpClient;
import org.apache.commons.httpclient.MultiThreadedHttpConnectionManager;

import javax.xml.namespace.QName;

public class EsbDemoProxy {

    private static EndpointReference targetEPR = new EndpointReference(
            "http://10.100.1.120:8280/bam/services/DemoProxy1");

    public static OMElement echoPayload(String x) {
        OMFactory fac = OMAbstractFactory.getOMFactory();
        OMNamespace omNs = fac.createOMNamespace("http://service.carbon.wso2.org", "example");
        OMElement method = fac.createOMElement("echoInt", omNs);
        OMElement value = fac.createOMElement("x", omNs);
        value.addChild(fac.createOMText(value, x));
        method.addChild(value);
        return method;
    }


    public static void main(String[] args) throws AxisFault {

        // creates a new connection manager and a http client object
        MultiThreadedHttpConnectionManager httpConnectionManager = new MultiThreadedHttpConnectionManager();
        HttpClient httpClient = new HttpClient(httpConnectionManager);
        for (int a = 0; a < 1; a++) {
            for (int i = 0; i < 1; i++) {
                ServiceClient sender = new ServiceClient();
                try {
                    OMElement payload1 = EsbDemoProxy.echoPayload("55");
                    Options options = new Options();
                    options.setTo(targetEPR);
                    options.setTransportInProtocol(Constants.TRANSPORT_HTTP);

                    OMFactory omFactory = OMAbstractFactory.getOMFactory();
                    OMElement omElement = omFactory.createOMElement(new QName("http://wso2.org/ns/2010/10/bam", "BAMEvent", "ns"), null);
                    omElement.addAttribute("activityID", "AAAAIsiasd-sdswodi-2329", null);

                    OMElement bampropertyElement = omFactory.createOMElement(new QName("http://wso2.org/ns/2010/10/bam", "Property", "ns"), null);
                    bampropertyElement.addAttribute("name", "ESB2_a", null);
                    bampropertyElement.addAttribute("value", "A", null);

                    omElement.addChild(bampropertyElement);
                    omElement.addChild(omElement);

                    sender.addHeader(omElement);

                    sender.setOptions(options);
                    OMElement result1 = sender.sendReceive(payload1);
                    String response1 = result1.getFirstElement().getText();
                    System.out.println(response1);

                } catch (Exception e) { // (XMLStreamException e) {
                    System.out.println(e.toString());
                }
                finally {
                    if (sender != null) {
                        try {
                            sender.cleanupTransport();
                        } catch (Exception e) {
                            e.printStackTrace();
                        }

                        try {
                            sender.cleanup();
                        } catch (Exception e) {
                            e.printStackTrace();
                        }
                    }
                }

                httpConnectionManager.closeIdleConnections(0);
                httpConnectionManager.shutdown();
            }
        }
    }
}


2. After sending few messages you will be able to observe the messages from the BAM Admin Console > Main Dashboard > Actvity Tab

Configuring WSO2 BAM to connect to different Databases

Connecting to mySql database.

1. You need to execute the mysql.sql in BAM_HOME/dbscripts folder.

- Navigate to where you have the above script.
- Login to MySQL as the root user.
mysql -u root -p
- give the password at the prompt

- Execute the mysql.sql script.
source mysql.sql


This will create the BAM database. To connect to the database you need to:

2. Copy the mysql driver to CARBON.
- Navigate to BAM_HOME/repository/components/lib and copy mysql-connector-java-5.1.7-bin.jar.

3. Update BAM_HOME/repository/conf/datasources.properties with your database information. A sample is done below.
synapse.datasources=bamMySQL
synapse.datasources.icFactory=com.sun.jndi.rmi.registry.RegistryContextFactory
synapse.datasources.providerPort=2199
synapse.datasources.bamh2.registry=JNDI
synapse.datasources.bamh2.type=BasicDataSource
synapse.datasources.bamh2.driverClassName=com.mysql.jdbc.Driver
synapse.datasources.bamh2.url=jdbc:mysql://localhost:3306/wso2bam_db
synapse.datasources.bamh2.username=wso2bam
synapse.datasources.bamh2.password=wso2bam‎
synapse.datasources.bamh2.dsName=bam_datasource
synapse.datasources.bamh2.maxActive=100
synapse.datasources.bamh2.maxIdle=20
synapse.datasources.bamh2.maxWait=10000

Connecting to Oracle database

1. You need to execute the oracle.sql in BAM_HOME/dbscripts folder.

- Login to SQLPlus as a sysdba and create the db user and grant required access.
$sqlplus sys as sysdba; 

SQL> startup
drop user wso2bam‎ cascade; 
Create user wso2bam‎ identified by wso2bam account unlock; 
grant connect to wso2bam; 
grant create session, dba to wso2bam;
commit;

Now login from the above created user and execute the oracle.sql script

sqlplus wso2bam/wso2bam@10.100.1.10/ORCL
SQL>>@/dbscripts/bam/bam_schema_oracle.sql;

This will create the BAM database. To connect to the database you need to:

2. Copy the mysql driver to CARBON.
- Navigate to BAM_HOME/repository/components/lib and copy ojdbc14.jar.

3. Update BAM_HOME/repository/conf/datasources.properties with your database information. A sample is done below.
synapse.datasources=bamOracle
synapse.datasources.icFactory=com.sun.jndi.rmi.registry.RegistryContextFactory
synapse.datasources.providerPort=2199
synapse.datasources.bamh2.registry=JNDI
synapse.datasources.bamh2.type=BasicDataSource
synapse.datasources.bamh2.driverClassName=oracle.jdbc.driver.OracleDriver
synapse.datasources.bamh2.url=jdbc:oracle:thin:@localhost:1521/wso2bam_db
synapse.datasources.bamh2.username=wso2bam
synapse.datasources.bamh2.password=wso2bam
synapse.datasources.bamh2.dsName=bam_datasource
synapse.datasources.bamh2.maxActive=100
synapse.datasources.bamh2.maxIdle=20
synapse.datasources.bamh2.maxWait=10000

Tuesday, November 9, 2010

Setting-up phpMyAdmin to administer MySQL databases from a web console.

In unix environment we usually use mysql command prompt to work with mySQL databases. Sometimes its hard to view large data tables from this manner. phpMyAdmin comes handy in this.

Below are the simple steps how you could setup it in Ubuntu.

1. Do an apt-get install to phpmyadmin

sudo apt-get install phpmyadmin

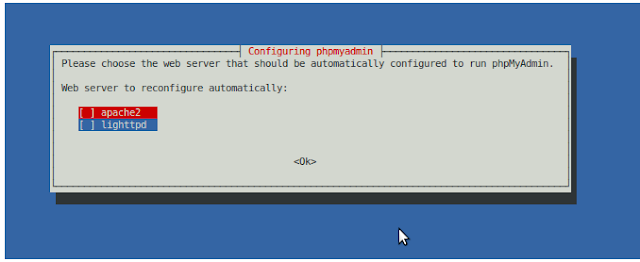
2. During the installation process it'll configure a web server and a database to run phpMyAdmin.


3. As final steps give user name and password to access the web console.

4. After the installation you can access phpMyAdmin via web console via http://localhost/phpmyadmin


5. Inside the admin console you may find all available mySQL databases listed in the top left corner of the window. Simply click on the required database to access it.


6. You can then browse, query, track, drop tables\data, import\export data using this console.


Tuesday, November 2, 2010

Creating a gadget for WSO2 Gadget Server using Carbon Studio

I've converted my last post on WSO2 Carbon Studio and Gadget Server, to a tutorial with more description added.

It is published in WSO2 Oxygen tank - Library as "Creating a gadget for WSO2 Gadget Server using Carbon Studio"

Wednesday, October 13, 2010

Adding a gadget to WSO2 Gadget Server using cApp

In previous posts I've explained how to install WSO2 cApp into eclipse  and how to start creating a WSO2 product artefact.

So as I promised in the earlier posts, here is how you create an artefact. In this post I will explain how to create a gadget which can be deployed in WSO2 Gadget Server and viewed from Gadgets' portal.

1. Create a cApp project as in here.

2. Create a gadget artefact.
Click on 'Create New artefact' button in root-artifact.xml in your cApp project and Select "Gadget" OR Right click on the cApp project you created and Select "Gadget". You will get 'New Gadget" creation wizard.

At the 'Name' prompt, give your gadget artifact a name and proceed.


In the next screen, specify a name for the folder containing you gadget specific artifacts and finish the wizard.

NOTE: The project that you will be creating the artifact in will appear selected in this window. If you want you can change it here.

So after this initial step you should have your project structure like this:

3. Develope the gadget code.
WSO2 cApp loads open social development environment (OSDE) in Eclipse. This is one of the plugins that is getting installed with cApp. So if you double click on your .xml file (maps.xml in my case) you will have the OSDE opened up on the right side of the IDE.

Now lets fill in the gadget code. The code that I am going to put in is a sample taken from googles gadget docs (http://code.google.com/apis/gadgets/docs/fundamentals.html#location).

In the proceeding steps I will show you how easy it is to create and deploy this using cApps.

<?xml version="1.0" encoding="UTF-8" ?>
<Module>
  <ModulePrefs title="Map of __UP_loc__" height="300" 
    author="Jane Smith" 
    author_email="xxx@google.com" /> 
  <UserPref name="loc" 
    display_name="Location" 
    required="true" />
  <Content type="html">
  <![CDATA[ 
    <script src="http://maps.google.com/maps?file=js" type="text/javascript"></script>
    <div id="map" style="width: 100%; height: 100%;"></div>
    <script type="text/javascript">
    var prefs = new gadgets.Prefs();
    var map = new GMap(document.getElementById("map"));
    map.addControl(new GSmallMapControl());
    map.addControl(new GMapTypeControl());
    var geocoder = new GClientGeocoder();
    geocoder.getLatLng(prefs.getString('loc'), showMap)

    function showMap(point) {
      if (point!=null) {
        map.centerAndZoom(point, 6);
      }
    };    
    </script>
  ]]> 
  </Content>
</Module>

And it is as simple as filling the tabs that you find at the bottom your IDE (see the image below).


ModulePrefs such as title, author, author_email can be filled in Basic tab - 'Attributes' section, fetures can be put in 'Features' section of the same.

I have a UserPref, 'loc' in my gadget which I created in 'UserPref' tab and yes I made it a required parameter. Since it doesn't have a default value I kept that option empty and I stick to default 'String' data type.

Then in the 'Content tab', I added my content. Click 'Add' button in 'Content' tab and say its an 'html' content (as you see in above code it is Content type="html"), and  since I go by default view I can leave 'view' type empty.

After you do that, you will have an entry created for the view that you added just now and now you need to fill in the 'Content' to it. So fill in 'Content'; This includes all things you put within CDATA tags.

NOTE: You DON'T need to type in <![CDATA[ section, as OSDE prints it by itself. And nore you cannot have <html>, <head>, or <body> tags as having them violate the gadget rules.

That's it! now if you navigate to 'Source' tab, you will see you gadget's code there with complete, correct syntax and perfect alignments.


4. Add the gadget to server's gadget repository.
You need to have a WSO2 Gadget Server binary distribution with you. Download it from here, extract and you are ready.

While in J2EE perspective in eclipse, go to Server area and add a WSO2 Gadget Server as described here. This will let you start the server from within eclipse.

After you started the server; Login to Gadget Server admin console and navigate to '/_system/config/repository/dashboards/gadgets' folder in internal registry. You will see the gadget that was deployed from cApp in here.


You can view and edit your gadget code from here.


Now that we saw the gadget having deployed in the Server from cApp, we have to follow two more steps to make it available in Gadgets' portal where it is actually used.

i. Grant anonymous user permission to the gadget.
For this navigate to '/_system/config/repository/dashboards/' in Registry and grant all permissions to 'anonymous user' for gadgets folder.


ii. Add the gadget to gadget repository.
From 'Manage Gadget Server' menu access 'Gadget Repository'. Click 'Add New Gadget' link from there. You need to add the gadget's information there.
  Gadget Name : Maps
  Gadget URL  : /registry/resource/_system/config/repository/dashboards/gadgets/maps.xml
You can add an image and description as you prefer.

iii. Make the gadget available by default
So now the gadget is added to the repository. We need to make it a default gadget.
Go to Gadget Repository and look for your maps gadget. Once you find it enable 'Make Default' and 'Show Gadget To Anonymous User' options.


Make Default -
Makes the gadget available to be added by any user who signs into gadget portal.

Show Gadget To Anonymous User -
Makes gadget available as a default gadget to non-signed in users.


5. Access the gadget from Gadgets' Portal
Now let's move to gadgets portal and use our gadget there.

i. Click on "View Portal' menu or directly accesss http://localhost:8080/portal
You could be automatically signed in as admin if you are in same browser session. Else click on 'Sign-in' link and sign in as admin (until u register a new user).

ii. Click on 'add tab' button on top of the portal window to add a new tab.

iii. Now let's our new gadget to this new tab. Click on 'Add Gadgets' button and it will open the gadget repository. Search for our 'maps' gadget and add it.

Return to the Dashboard and you'll see your gadgets!!!

Featured

Selenium - Page Object Model and Action Methods

  How we change this code to PageObjectModel and action classes. 1 2 3 driver . findElement ( By . id ( "userEmail" )). sendKeys (...

Popular Posts